As our work environments become more and more digitized, end users express a greater need to access software systems quickly and efficiently. Single Sign On (SSO) has been introduced to reduce the complexity for end users by enabling them to log in to multiple applications with one set of login credentials.
What are the benefits of Single Sign On?
SSO presents a variety of benefits. Firstly, a simplified sign-on process reduces the time it takes for end users to access all relevant applications. Once end users enter the internal system, they do not need to enter another password for the application. Secondly, SSO is more likely to reduce workload for the help desk. Without an SSO implementation, end users will need to remember several passwords for several applications. In this instance, passwords are likely to be mixed up or forgotten, leading to users being locked out of said application. To solve this issue, the help desk would be required to unblock said user and reset their password. With SSO, this action becomes virtually nullified thus relieving the help desk of additional work.
Furthermore, SSO increases the level of security. It is challenging for end users to create strong passwords when they need to create multiple passwords for multiple applications. With SSO, end users can focus on creating one strong password which they can use across all applications. Hence, SSO significantly improves security. Hen
Maximo has the ability to implement SSO. Once it is implemented, users are simply required to type the Uniform Resource Locator (URL) and it will direct them to the Start Center. In this blog, we will explain how to implement SSO in Maximo with the assumptions that both Maximo and Active Directory (AD) are already installed.
There are nine steps that we need to follow:
1. Create Maximo Admin users in AD: Maxadmin, Maxreg and Mxintadm.
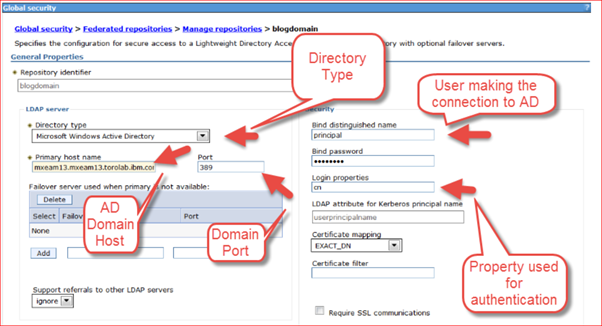
2. Configure Websphere
3. Enable Maximo authentication against your directory server. This step requires you to rebuild and redeploy EAR file.
4. Set up Kerberos configuration on the application server.
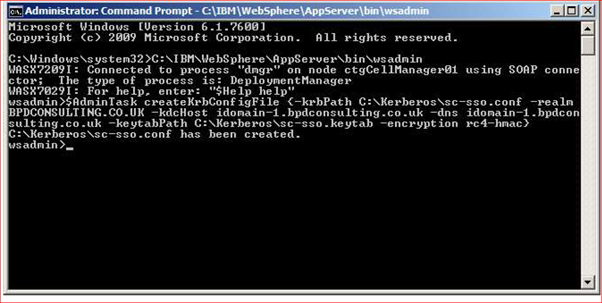
Source: https://www.ibm.com/support/pages/maximo-and-ldap-configuration-start-finish
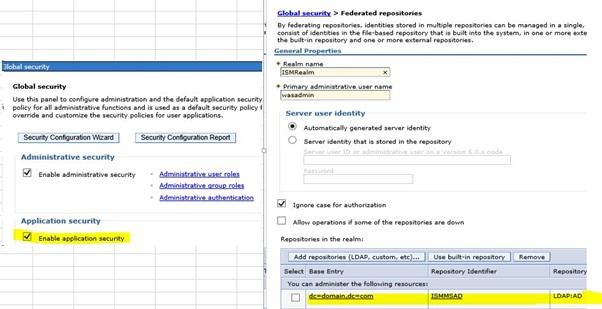
5. Enable Websphere security.
6. Enable Single Sign On.
7. Enable SPNEGO in Websphere.
8. Restart the application server.
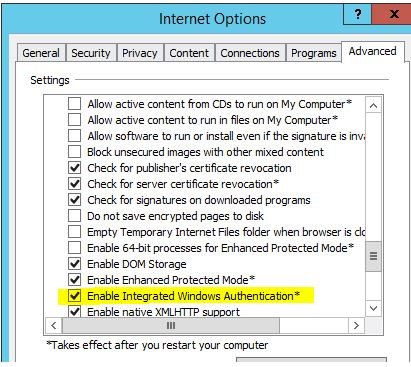
9. Configure Browsers.
BPD Zenith has just implemented SSO in the Australian Antarctic Division in 2020. If Maximo and AD are both installed, a maximum of 3-4 days will be required to implement SSO (including the implementation in TEST environment). Please contact us if you are interested in implementing SSO in your Maximo environment via this link.