IBM Maximo Attachments is a feature for organisations seeking to centralize their asset management documents in a single location. It offers a straightforward method of accessing and storing documents such as equipment manuals, maintenance records, and other important documents. Moreover, users with appropriate permissions can upload documents from any device and share them with other users. This feature streamlines collaboration and facilitates secure access to documents.
The attachment feature also includes a document scanning function, which is especially advantageous for businesses that rely on physical documents for their asset management requirements. By automating the document scanning process, this feature not only saves time but also reduces the need for manual labor, enhancing accuracy in the process.
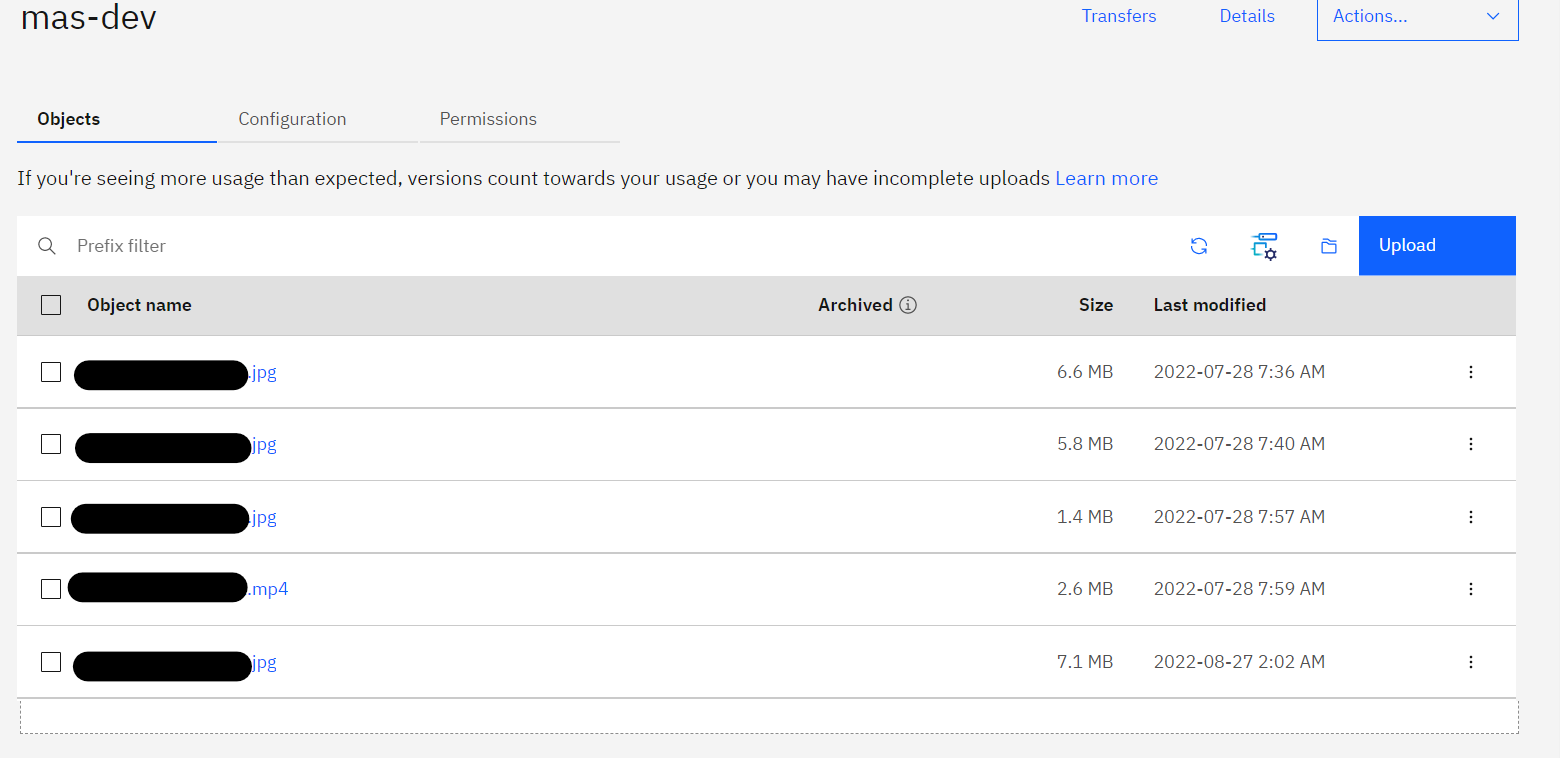
While the powerful feature provides a great repository of information, companies that require constant document updates or photo uploads of completed work may eventually encounter storage problems that require additional server space.
To solve this problem, IBM Maximo integrates with Cloud Object Storage (COS), which has become an increasingly popular way to store and share data in a secure and cost-effective manner. COS provides a unified platform for developers to access, store, and share data in the cloud. It offers many advantages, such as scalability and flexibility. In addition, it can handle large volumes of data and be used for personal and corporate applications.
Today I will demonstrate how to configure a COS solution using IBM Cloud, enabling you to save your files securely and free from concerns about space limitations.
Creation of IBM Cloud Object Storage (COS)
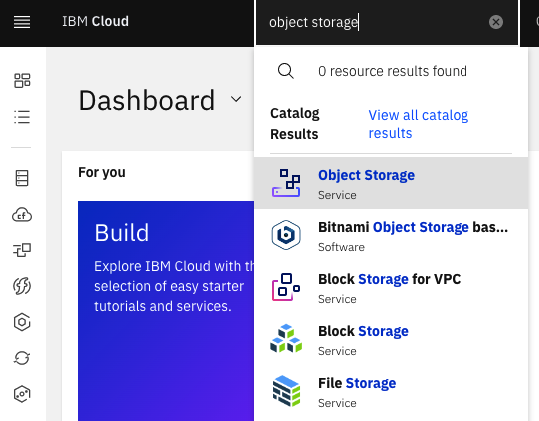
Sign into the IBM Cloud, and search for Object Storage in the Catalog search field.
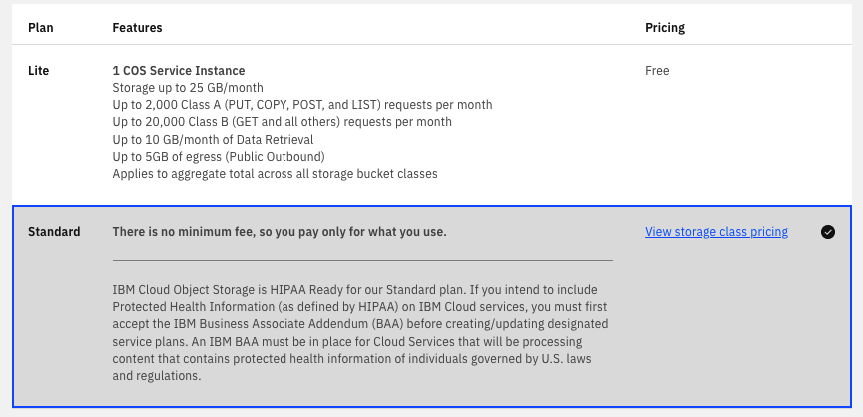
In the infrastructure session, leave IBM Cloud selected and choose the Standard plan.
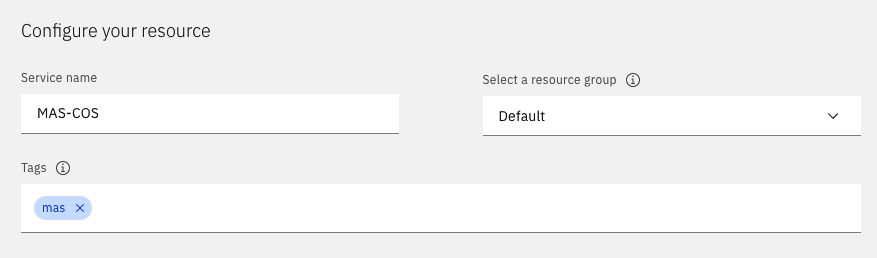
Fill in the COS name and resource group in the “Configure your resource” session.
Click on the Create button. This action is required only once. After the creation, you can use the same instance to configure the other MAS environments using the buckets.
Configuring COS
Creation of Buckets
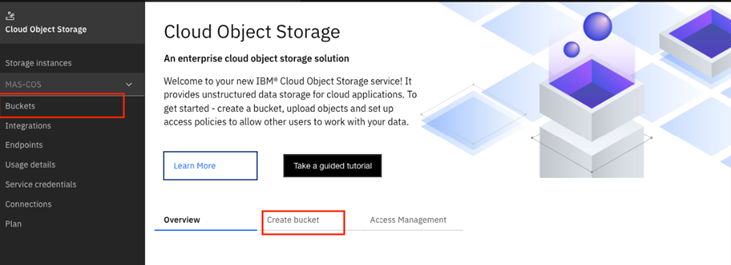
Click the side menu in Buckets or Create Bucket if COS was newly created.
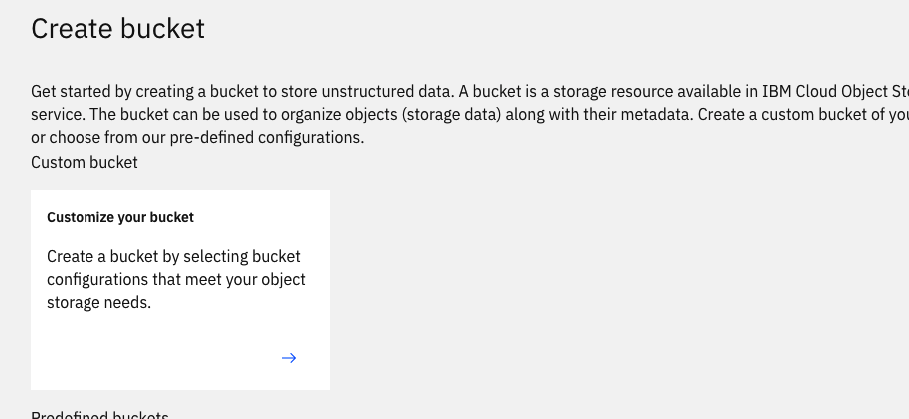
Click on the Create bucket button.

Select the option “Customize your bucket”.
Select a name that must be unique within the IBM Cloud, the region, and the Smart Tier storage class.
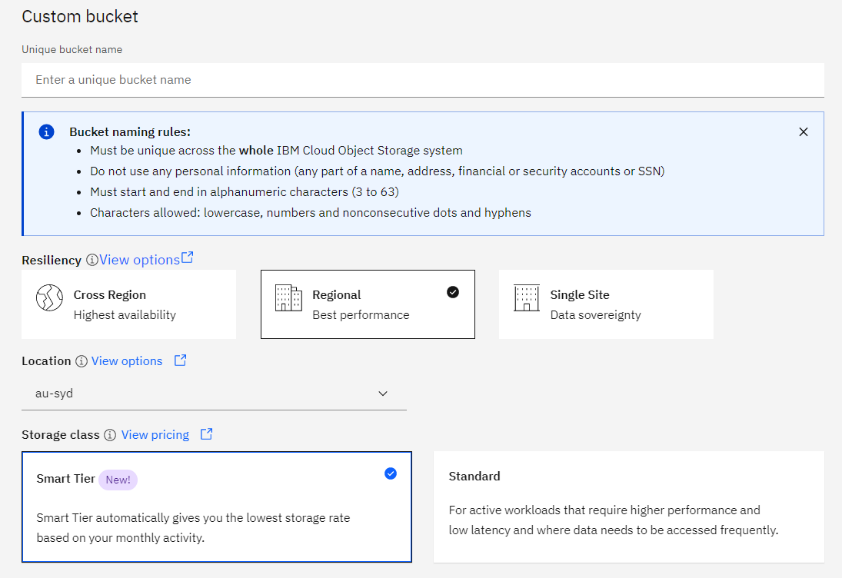
At the end of the page, click on the Create bucket button.
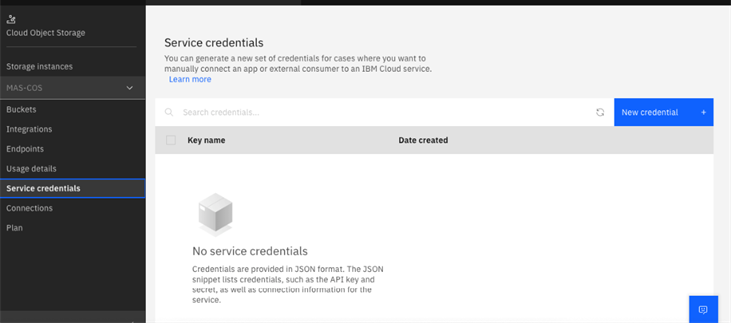
Service Credentials
Click on the side menu, select the Service Credentials option, and click the New credential button.
Fill in the Name, select the role as Writer, and Service ID as Auto Generate.
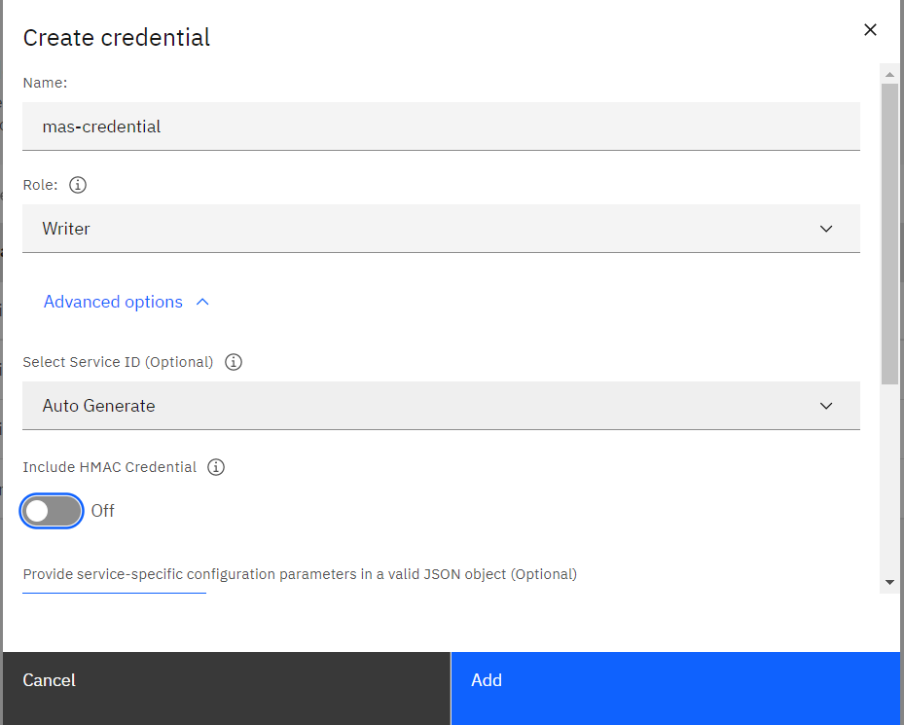
Below, check the option “Include HMAC Credential” and click on Add.

All done. The Cloud Object Storage is created and configured. Next, go to the Manage application or Maximo Asset Management 7.6.1.1+ to complete the setup.
Manage/Maximo EAM Setup
Sign in to Manage or Maximo EAM 7.6.1.1+ and navigate to System Properties application. Then, search for the properties below. You can copy and paste it into the field to search for it.
mxe.cosaccesskey, mxe.cossecretkey, mxe.cosendpointuri, mxe.cosbucketname, mxe.attachmentstorage, mxe.doclink.securedAttachment, mxe.doclink.doctypes.defpath, mxe.doclink.dotypesc.topLevelPaths, mxe.doclink.path01
Fill in the properties as shown below:
mxe.cosaccesskey = [access_key_id]
mxe.cossecretkey = [secret_access_key]
mxe.cosendpointuri = [regional_endpoint_uri]
mxe.cosbucketname = [bucket_name]
mxe.attachmentstorage = com.ibm.tivoli.maximo.oslc.provider.COSAttachmentStorage
mxe.doclink.securedAttachment = True
mxe.doclink.doctypes.defpath = cos:DOCLINKS\default
mxe.doclink.doctypes.topLevelPaths = cos:DOCLINKS
mxe.doclink.path01 = cos:DOCLINKS=default
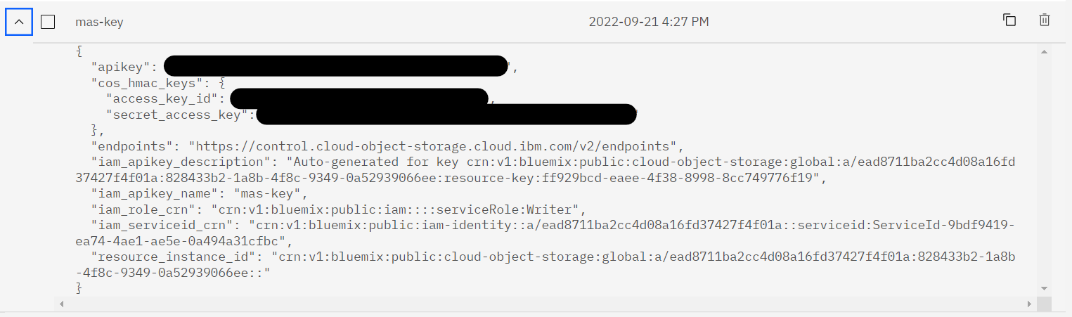
To access the access_key_id and the secret_access_key, navigate to the IBM Cloud and reopen the Cloud Object Storage page. Next, go to the Service Credentials menu and expand your created credential.
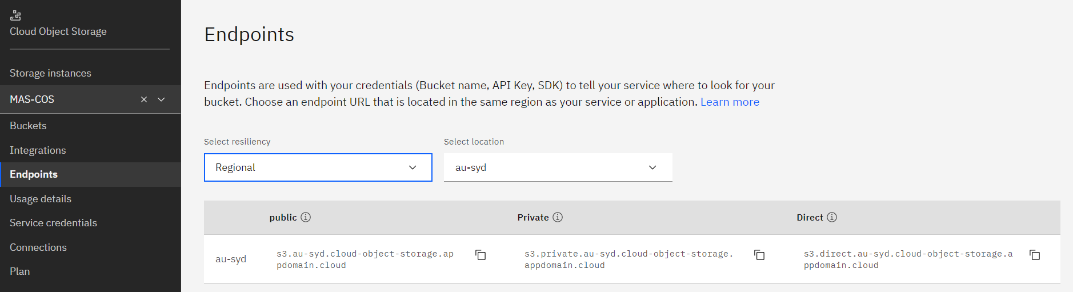
To recover the regional_endpoint_uri, click on Endpoints and filter by the region selected in the COS creation. Then, use the public URL and https:// to fill out the system property.
After all system properties are configured, restart Maximo’s MXServers, and the attachments will be sent to the IBM Cloud Object Storage.
In conclusion, Cloud Object Storage offers a variety of advantages that traditional storage solutions cannot provide. It enables organisations to scale storage capacity up or down quickly and cost-effectively without the need for physical hardware. It also offers the enhanced security by storing data in a secure, remote location. Additionally, Cloud Object Storage can help organisations reduce their IT costs and resources by freeing up personnel to focus on more strategic initiatives. Finally, Cloud Object Storage provides a cost-effective solution for organisations to store, manage, and access large amounts of data without sacrificing performance or reliability.