After nearly 20 years of implementing Maximo for various organisations across a myriad of industries, there are some basic design principles that I like to follow on a new (greenfield) Maximo installation. Please note that these are some of my personal preferences but can be adapted accordingly to meet specific Maximo implementation requirements. The purpose of this blog is to provide general advice and guidance on implementing new Maximo environments and features.
Firstly, I will go over the initial setup for creating the organisation and site entities as there is a set order in which the setup should be performed.
A lot of my Maximo implementation recommendations come from the following considerations:
- Ease of user experience
- Ease of Reporting
- Order of operations during system setup
- Simplicity of use
- Naming Conventions
- Future Proofing
- Avoiding the ‘gotcha’ problems in the future
Org/Site Creation in your Maximo implementation
Before creating an Active Site there are several steps that need to be done in the following order:
1. Define Inventory and Company Sets

TIP: Keep naming generic, like COMPSET1, ITEMSET1 etc. Most Sites only require one of each unless multiple Organisations planned to separate Inventory and Procurement.
2. Define Currencies
An organisation needs a default currency to be recorded against any financial transaction. Create the default currency in the Currency Codes application. If multiple currencies are required for procurement, add them also as shown below:
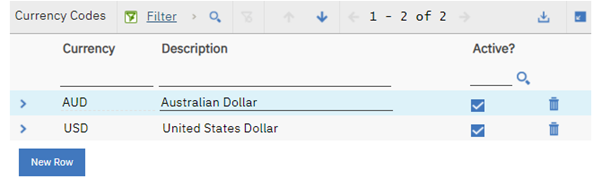
TIP: When entering currency codes always use the ISO 4217 codes as this avoids a lot of integration issues in the future.
Exchange rates can also defined but are not generally needed unless cross-organisation (with different currencies) transactions are required.
3. Define GL Account Structure
Before activating a Site you must define an organisation clearing account and as such you will need to define the account structure at this time. It can be very difficult to change account structures on a live system with historic financial transactions, so it is best to finalize the structure at this time. For example:
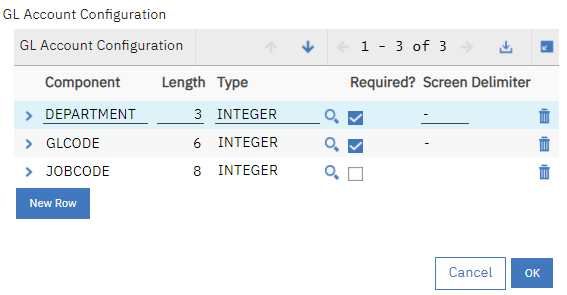
TIP: If possible, it is best to align the account structure to match that of your financial system.
At this time, you will also want to define the GL Validation Rules:

Unless you require general ledger reporting or integration you can turn GL validation off, otherwise you will need to populate all the valid GL codes and combinations into Maximo.
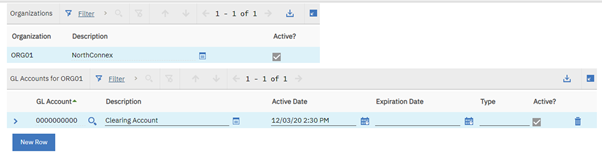
You can define the GL Components and Accounts for the clearing account at this stage, or just enter dummy values as this can be changed later.
Enter all the above details in into the Organisation record:
Once you have the following you will be able to create and activate the Organisation and Sites:
- Company and Item Sets
- Base Currency
- GL Account Structure
- Chart of Accounts Clearing Account (see notes above)
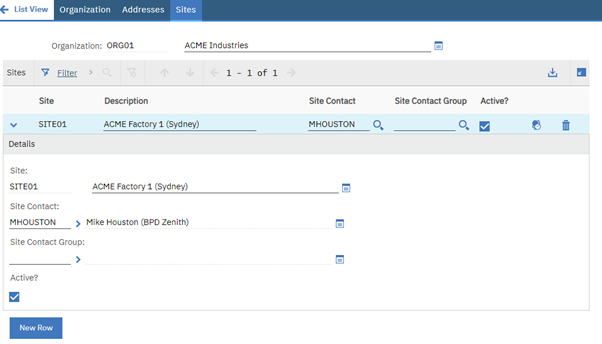
With all the above configurations, you can now create the Organisation record of your Maximo implementation:
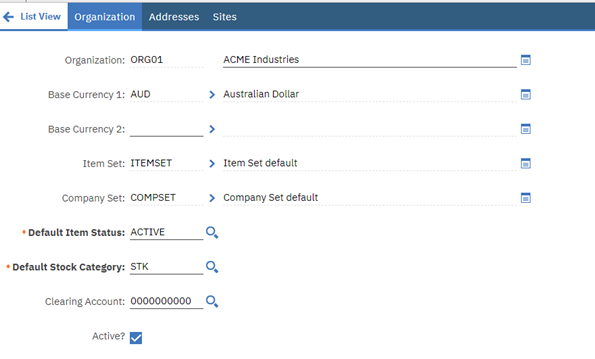
TIP: For ORG and SITE naming, I recommend generic naming conventions for ORG and SITE identifiers (for example ORG01, SITE01) as this code cannot be changed easily in the future. Real world organisation changes often involve remaining companies, sites etc and this is difficult to change in Maximo. Using this method, the ORG or SITE description can be changed, and this is reflected throughout the application.
Security Groups in your Maximo implementation
Security groups should be created to represent the different roles in the organisation, i.e. TECHNITION, SUPERVISOR, STORES, PROCUREMENT. These groups should have the bare minimum privileges that these roles require to function their day to day activities.
Additional groups can be used to elevate particular users privileges, for example delegation of authority, approval rights or historic editing.
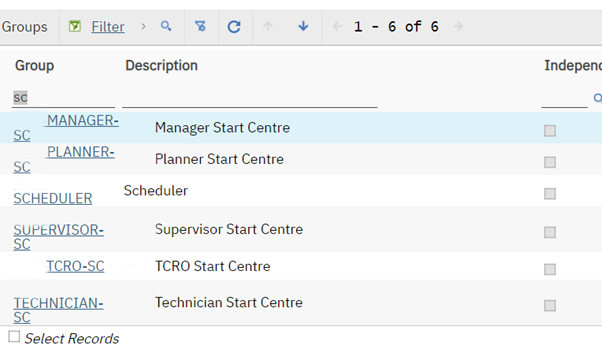
A security group should also be created for each start centre so administrators have flexibility over assigning users multiple start centres if required:
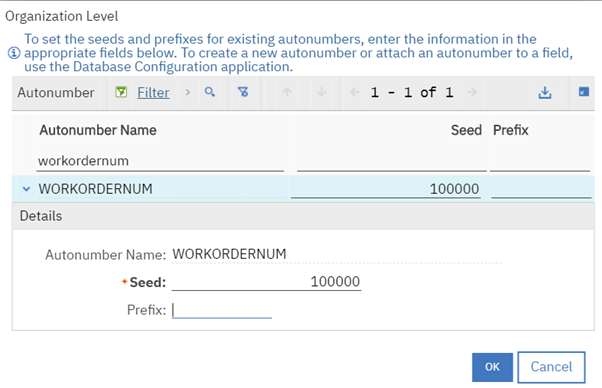
Autonumbering:
Enabling auto numbering for transactional records like Work orders and PO’s is recommended as it maintains a cleaner view in Maximo and enables sorting on list screens. I like to set the seed to 100,000 as this will require 900,000 work orders/tasks before rolling over to the next digit, as shown below:
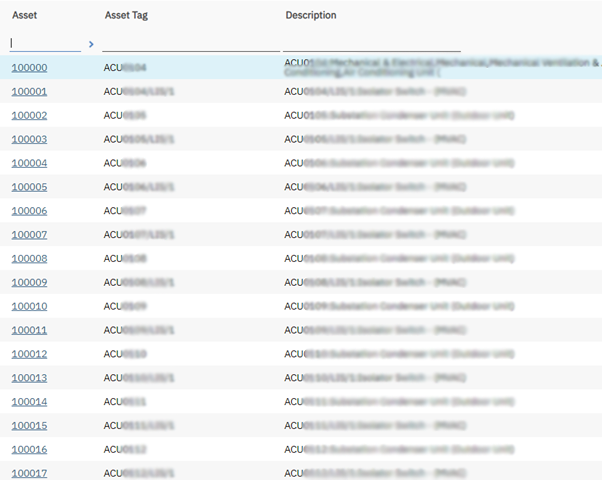
Asset autonumbering should also be considered as opposed to an intelligent identifier.
Maximo does not allow the changing of asset numbers once created and this may cause issues in the future of an asset identifier changes. For example, you will not be able to change TRUCK1 to TRUCK2 if the assets are renumbered.
Consider using fields like Description and Asset Tag to store the asset information as these can be changed in the future:
Classifications in your Maximo implementation
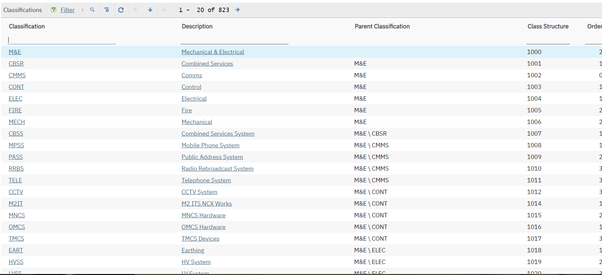
Maximo uses classifications to group certain types of master data, for example, Assets, Locations, Work Orders.
Using asset and location classification is critical for reporting, failure analyses and performance monitoring. While the classification/hierarchy setup can be very complex, using unique codes for each classification simplifies things greatly. For example:
Failure Hierarchies
Alongside classifications, failure codes and failure reporting are key elements in Maximo for asset failure and performance reporting.
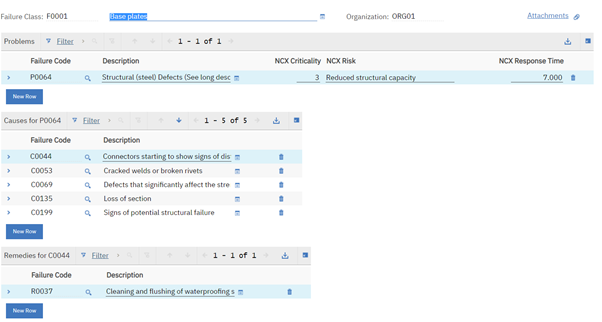
As with the classification/hierarchy setup, failure code hierarchies can also be very complex. Using unique codes for each problem such as cause and remedy code can simplify this.
For example, in the screenshot below it would be a simple query to search and report on any work orders for assets with problem C0053 (cracked weld) that required a remedy of R0037 (cleaning).
As these codes are incrementally numbered it is now easy to modify the definition of any of the PCR codes without the significant effort that would be required to modify an existing PCR hierarchy.
If you have any questions about the contents of this blog or need further guidance setting up a Maximo implementation for your organisation, please reach out to BPD Zenith.